Custom data layer name
A data layer is a data structure on your site or app where you can store data and access it with Tag Manager. The default data layer name is dataLayer, but you can change it to a custom one.
Choose a unique data layer name
Use a unique data layer name. Make sure that it’s not used by other tools installed on your site or app. If the names are the same, the tools can interfere with each other.
To check if the data layer name is used on your site or app, follow these steps:
Pick your new data layer name. Example:
customDataLayer.In a browser’s console, run the following script with the picked name:
var dataLayerName = "customDataLayer";
!window.hasOwnProperty(dataLayerName);
If the return statement is
true, you can use this name safely. It means that no other tool is using this name.
Rename your data layer
To rename the data layer, follow these steps:
Log in to Piwik PRO.
Go to Menu > Administration.
Navigate to Sites & apps.
Select the site or app for which you want to rename the data layer.
Navigate to Installation.
Copy the basic container’s code. You’ll modify this code in the next steps.
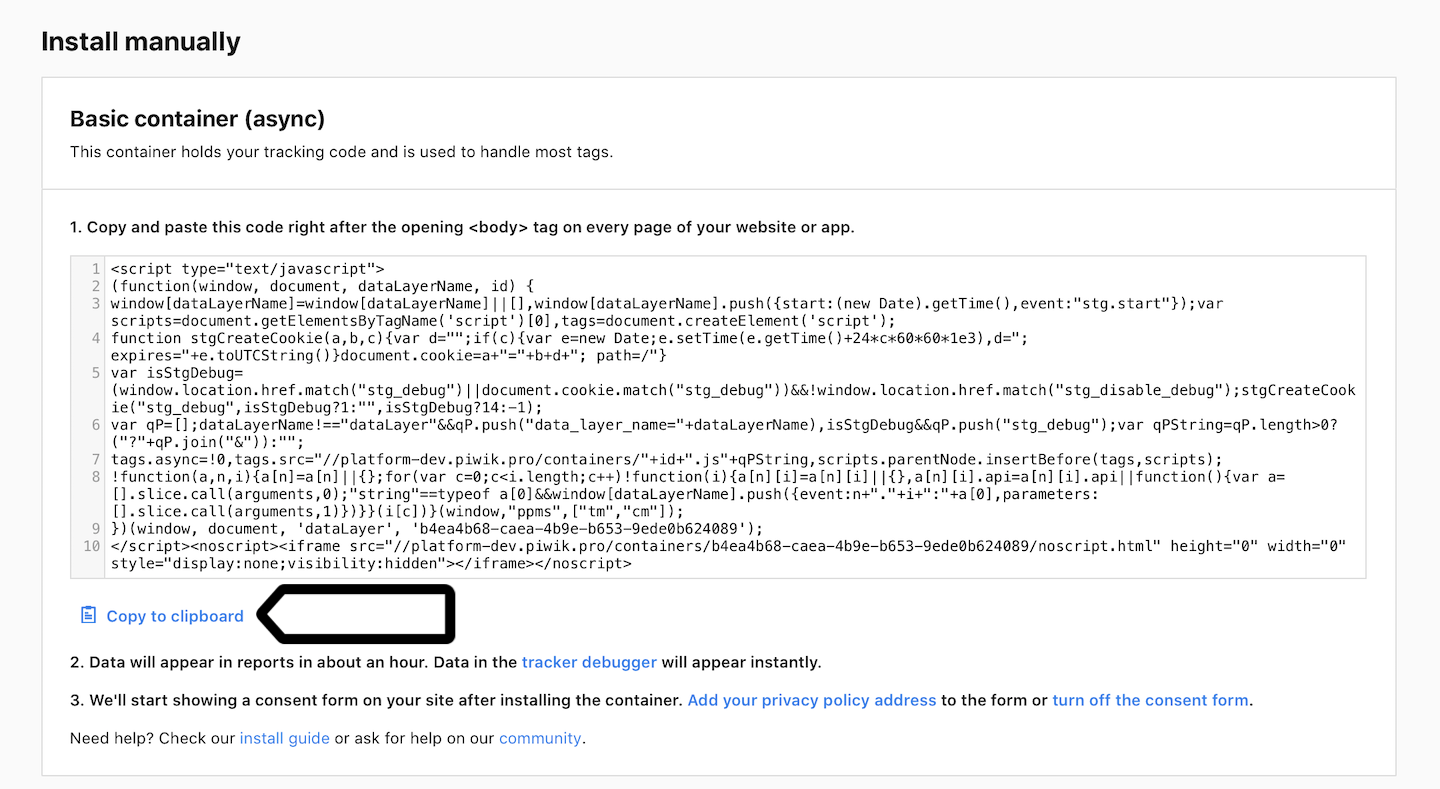
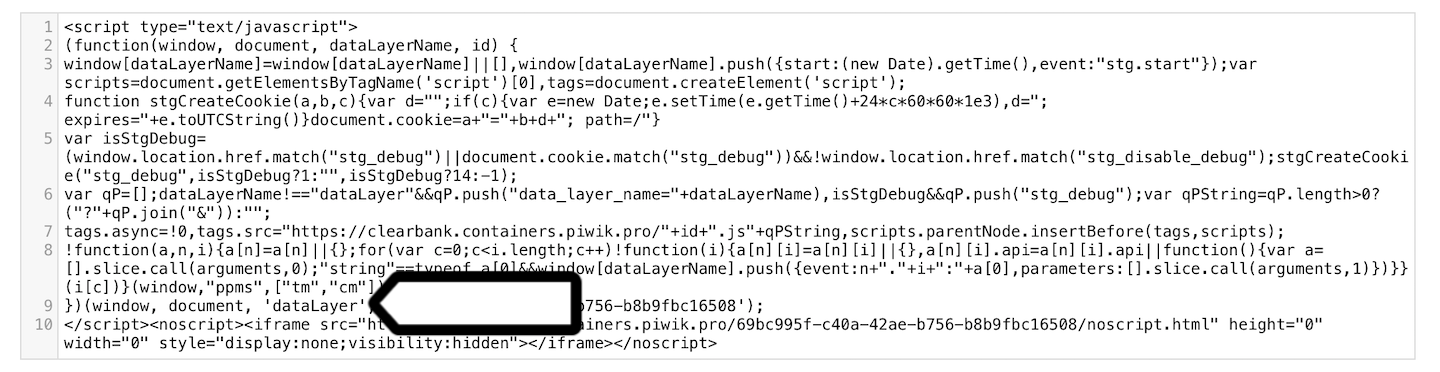
In the copied code, change
dataLayerto a custom name.(window, document, 'dataLayer', '69bc995f-c40a-42ae-b756-b8b9fbc16508');
Paste the code right after the opening <body> tag on every page of your website or app.
Optionally, copy the additional container’s code. You’ll modify this code in the next steps.
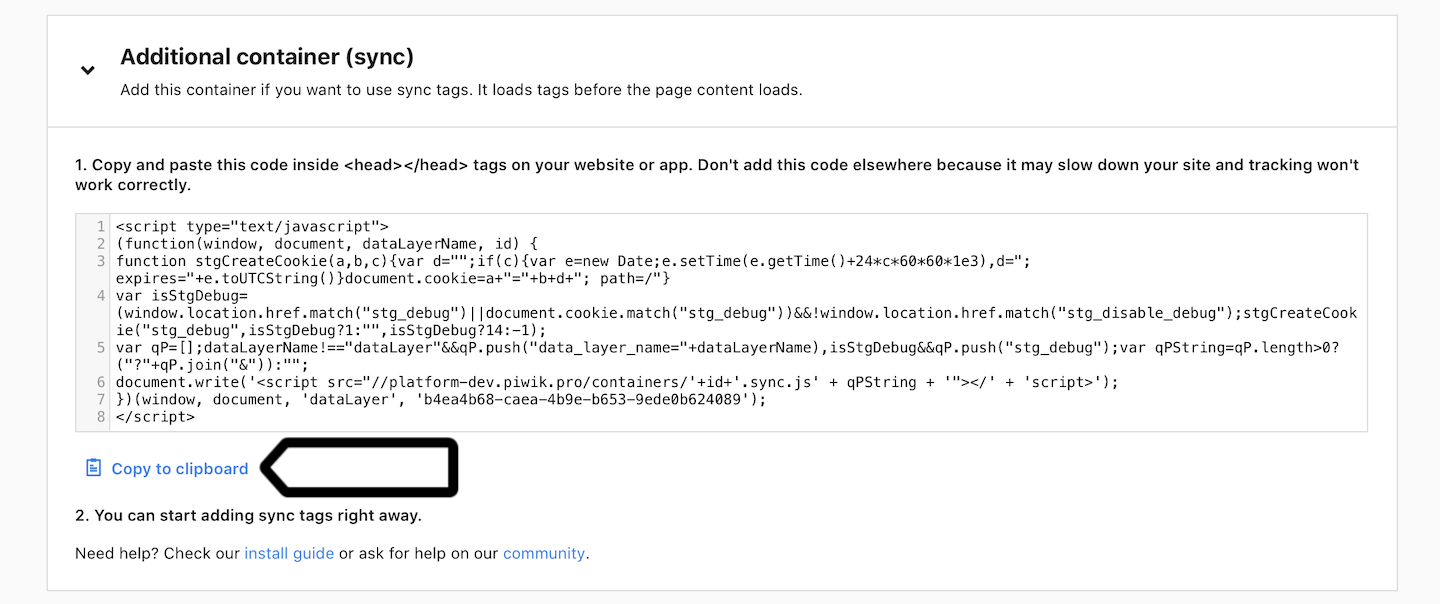
In the copied code, change
dataLayerto a custom name.(window, document, 'dataLayer', '69bc995f-c40a-42ae-b756-b8b9fbc16508');

Note
If you’re using both containers, use the same data layer name in each container. Otherwise, things can break.
Paste the code inside <head></head> tags on your website or app. Don’t add this code elsewhere because it may slow down your site and tracking won’t work correctly.
Replace all existing references to the old data layer name. For example, if you use
dataLayer.push({event: "test-event"});
replace it with
customDataLayer.push({event: "test-event"});
WordPress plugin: rename your data layer
If you installed our containers with the WordPress plugin, you can quickly rename the data layer in the plugin settings.
To rename the data layer in our WordPress plugin, follow these steps:
In your WordPress admin panel, go to Settings > Piwik PRO.
In Data layer, change the name to a custom one.
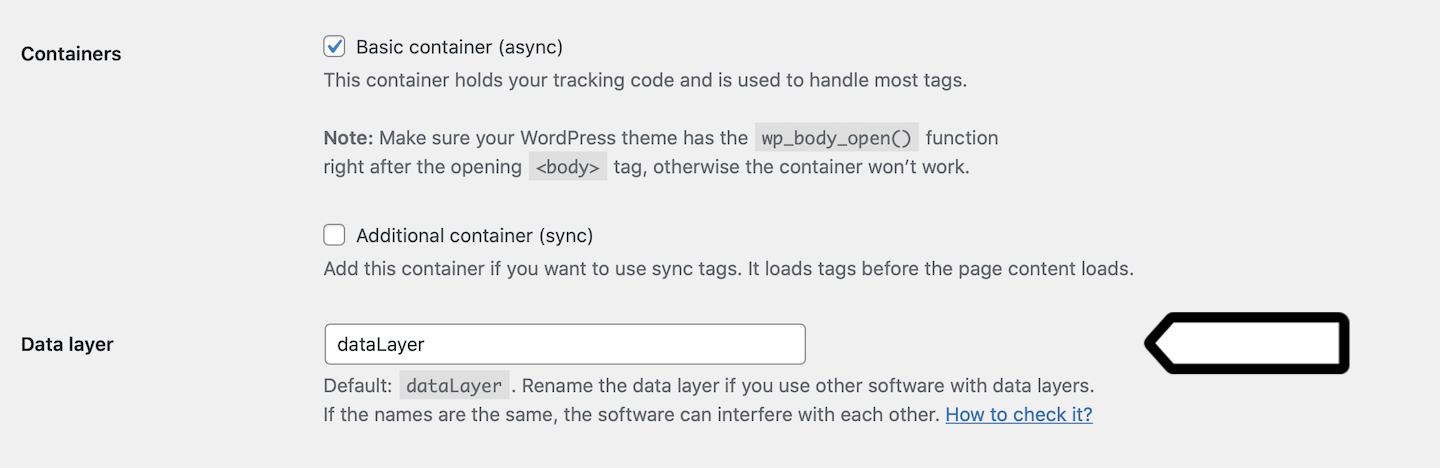
Click Save changes.
Replace all existing references to the old data layer name. For example, if you use
dataLayer.push({event: "test-event"});
replace it with
customDataLayer.push({event: "test-event"});